 how-to
How to Fix a Leaking Dishwasher: Step-by-Step Guide
Table of Contents
- Common Causes of Dishwasher Leaks
- Tools Needed for Dishwasher Repair
- Step 1: Check the Door Gasket and Seals
- Step 2: Inspect the Door Latch Mechanism
- Step 3: Examine Hoses and Clamps for Leaks
- Step 4: Clean the Filter and Drain System
- Dishwasher Door Seal Replacement
- Signs Your Dishwasher Needs Replacing
- Frequently Asked Questions
Last Updated: September 3, 2026
Common Causes of Dishwasher Leaks
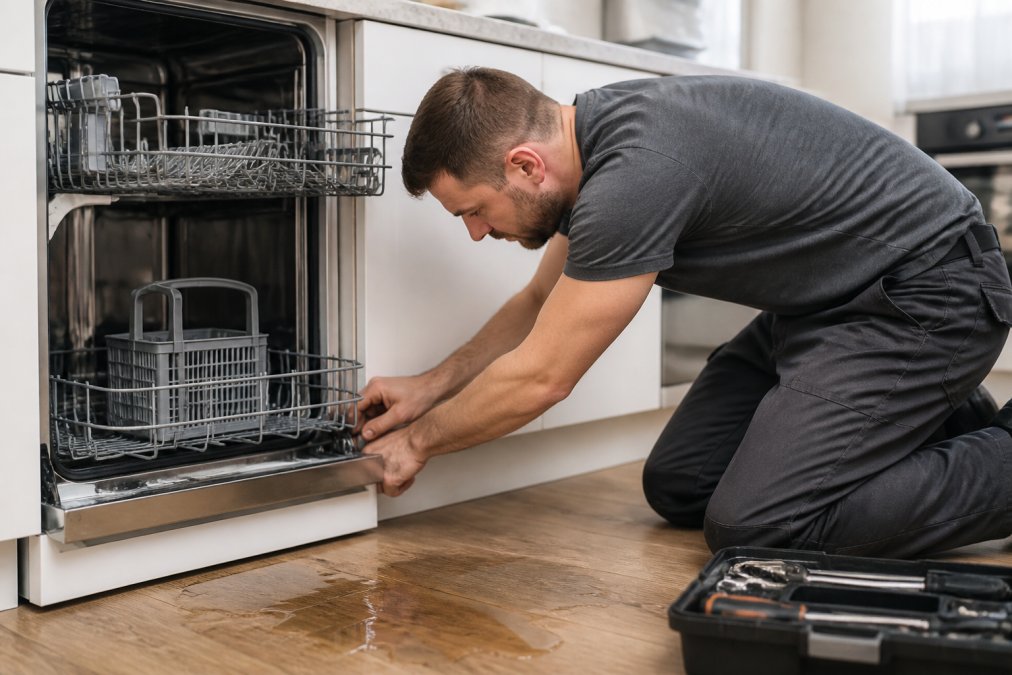
A leaking dishwasher is one of the most common appliance problems homeowners face, and the good news is that many causes are fixable without calling a professional. Water pooling under your dishwasher or dripping from the door usually points to one of a few specific culprits: a worn door gasket, a faulty door latch, clogged drain components, or loose hose connections. Understanding what's causing the leak is the first step toward fixing it yourself.
The door gasket, that rubber seal running around the inside edge of the door, deteriorates over time from repeated opening and closing. When it cracks or warps, water escapes during the wash cycle. Similarly, the door latch mechanism can wear out, preventing the door from sealing properly. Inside the dishwasher, debris accumulation in the filter or drain system restricts water flow, causing backup and overflow. Hoses that connect to your water supply or drain can develop cracks or come loose at their clamps, allowing water to leak directly onto your kitchen floor.
Before you attempt any repairs, unplug the dishwasher or turn off its circuit breaker at the electrical panel (osha.gov). This is a critical safety step. You'll also want to place towels around the base to catch any remaining water inside the unit. Most of these repairs take between 30 minutes and two hours, depending on the specific issue and your comfort level with basic appliance maintenance.
Tools Needed for Dishwasher Repair
Having the right tools on hand makes the repair process straightforward and prevents frustration. You won't need specialized equipment, most of these items are already in a typical household toolkit.
A screwdriver set with both Phillips and flathead options is essential for removing panels and accessing internal components. A flashlight or headlamp helps you see inside the dishwasher's dark interior, especially when inspecting the door gasket or drain area. Needle-nose pliers are useful for removing debris from tight spaces and for tightening hose clamps. A bucket or large towel catches water that spills when you disconnect hoses. A soft brush or old toothbrush cleans debris from the filter assembly and gasket surfaces. You may also need adjustable wrenches if your dishwasher uses compression fittings on the water inlet valve connections.
Depending on what you find during your inspection, you might need replacement parts: a new door gasket, hose clamps, or a new drain hose. If you discover the water inlet valve is faulty, you'll need a replacement valve. Many of these parts are inexpensive and available online or at appliance supply stores. Having a container for small screws and fasteners prevents losing parts during disassembly.
Step 1: Check the Door Gasket and Seals
The door gasket is the most common source of dishwasher leaks, and inspecting it should be your first troubleshooting step. Open the dishwasher door fully and look at the rubber seal that runs around the perimeter. Run your fingers along the entire gasket, feeling for cracks, tears, hardening, or flattened sections where the seal no longer makes contact with the door frame.
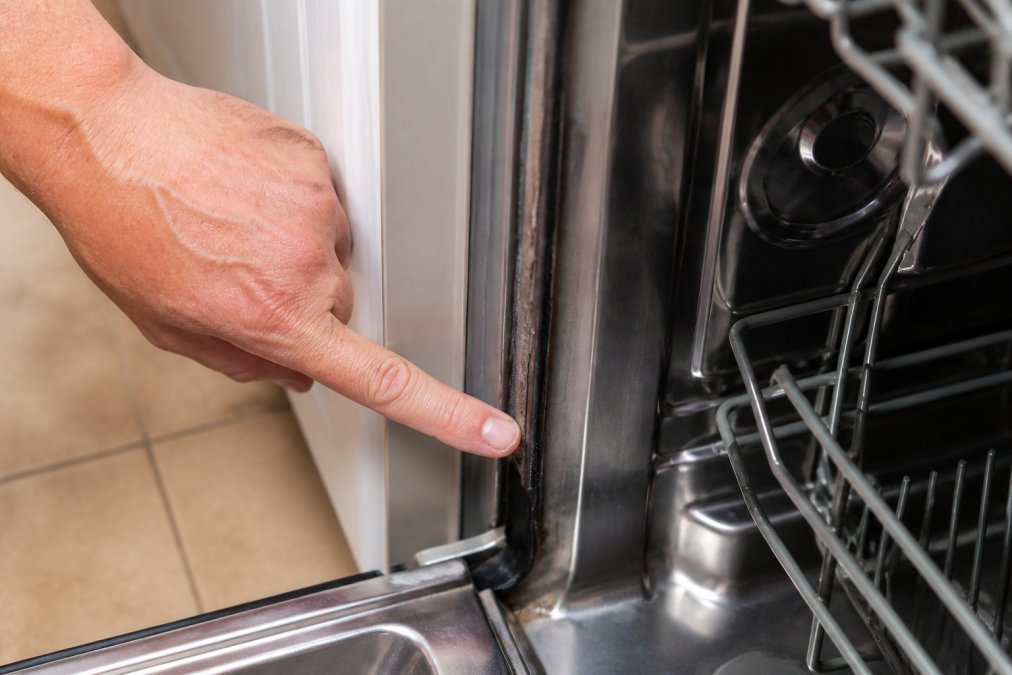
Inspecting for Damage
Look for visible signs of wear: discoloration, brittleness, or areas where the rubber has lost its flexibility. If you see cracks, gaps, or warping, replacement is your best option. Sometimes the gasket appears intact but has accumulated food particles and mineral deposits that prevent a tight seal. This is often the case with older dishwashers or those running in hard-water areas.
Check the door frame itself for corrosion or buildup that might prevent the gasket from sealing properly. Even a small amount of debris on the frame can create a gap where water escapes. The door latch mechanism also affects gasket performance, if the door doesn't close with firm, even pressure, the gasket won't seal completely.
Cleaning the Gasket
Before replacing the gasket, try cleaning it thoroughly. Mix warm water with a small amount of white vinegar and use a soft brush to scrub away debris and mineral buildup. Pay special attention to the grooves and crevices where food particles accumulate. Rinse well and dry completely. Sometimes this simple cleaning restores the seal and stops the leak.
If cleaning doesn't resolve the leak and you see visible damage to the gasket, replacement is necessary. Most door gaskets are held in place with a simple groove or clip system and can be removed by hand or with light prying. Ensure you order the correct gasket for your dishwasher model, gaskets vary by manufacturer and model number.
Step 2: Inspect the Door Latch Mechanism
The door latch is responsible for pulling the door tight against the gasket, creating a watertight seal. If the latch is worn or broken, the door won't close securely, and water will leak out during operation. Open the door and examine the latch on the door frame, it's usually a plastic or metal piece that catches when you close the door.
Press the door closed and listen for a distinct click. If you hear a soft click and the door feels snug, the latch is likely functioning correctly. If the door closes loosely or you don't hear a clear click, the latch mechanism may be worn. Try closing the door several times to see if the latch catches consistently or if it sometimes fails to engage.
Inspect the latch for cracks, broken plastic, or metal deformation. Even small damage can prevent the door from sealing properly. If the latch appears damaged, you'll need to replace it. This repair is more involved than gasket replacement and may require removing the door panel, so assess your comfort level before attempting it. Many homeowners find this step worth calling a professional for, but it's still a manageable DIY repair if you follow the manufacturer's instructions carefully.
Step 3: Examine Hoses and Clamps for Leaks
Water inlet hoses bring fresh water into your dishwasher, while drain hoses carry used water out. Both can develop leaks from age, pressure stress, or loose connections. Start by locating the inlet hose, which connects to your home's water supply line, usually under the sink. Follow it to where it attaches to the dishwasher, this connection point is a common leak source.
Check the hose itself for cracks, bulges, or splits. If you see damage, the hose needs replacement. Look at the hose clamps at both ends of the connection, these metal bands tighten to hold the hose securely in place. Using your adjustable wrench or pliers, check that both clamps are tight. Sometimes a leak is simply caused by a loose clamp that's worked its way free over time. Tighten the clamp by turning the screw clockwise, but don't over-tighten, as this can damage the fitting.
The drain hose, which exits the dishwasher and connects to your sink's drain or disposal, should also be inspected. Trace it from the dishwasher to where it connects to your plumbing. Look for kinks, cracks, or loose connections. A kinked drain hose can cause water to back up inside the dishwasher, leading to overflow and leaks. Straighten any kinks and ensure the hose slopes downward toward the drain to promote proper water flow. If the drain hose is cracked or deteriorated, replacement is straightforward and inexpensive.
Step 4: Clean the Filter and Drain System
The filter assembly and drain system are designed to catch food debris and prevent it from clogging your home's plumbing. However, when these components get blocked, water can't drain properly and backs up inside the dishwasher, eventually leaking out. A clogged filter is one of the most overlooked causes of dishwasher leaks.
Locate the filter at the bottom of the dishwasher, it's usually a cylindrical or basket-shaped component. Remove it by twisting counterclockwise or lifting, depending on your model. Rinse the filter under running water and use a soft brush to remove trapped debris. Pay attention to the small holes in the filter; these can become clogged with mineral deposits or food particles. If the filter is damaged or heavily calcified, replacement is inexpensive and improves drainage significantly.
Below the filter, you'll find the drain system with a float assembly and float switch. These components regulate water level and prevent overflow. Check that the float moves freely and isn't stuck in the raised position. A stuck float can trick the dishwasher into thinking the tub is full, causing water to overflow. Clean around the float assembly to ensure debris isn't restricting its movement. Also inspect the drain pump area for visible blockages. Use your flashlight to peer into the drain opening and remove any obvious debris with needle-nose pliers.
Mineral buildup from hard water can accumulate in the drain system over time. Running a cleaning cycle with white vinegar helps dissolve these deposits. Fill a cup with white vinegar and place it in the upper rack, then run a hot water cycle on an empty dishwasher. This sanitizes the interior and helps clear minor clogs in the drain system.
Dishwasher Door Seal Replacement
When the door gasket is cracked, warped, or no longer seals properly, replacement is the only solution. This is one of the most straightforward repairs you can perform on a dishwasher.
First, order the correct replacement gasket for your dishwasher model. You'll need your model number, which is usually found on a sticker inside the door frame or on the side of the unit. Check the manufacturer's website or contact their support line to confirm you have the right part, gaskets vary significantly between models and brands.
Before installing the new gasket, clean the door frame thoroughly. Remove any debris, mineral deposits, or old gasket material using a soft brush and vinegar solution. Dry the frame completely. Most gaskets are held in place with a groove or channel that runs around the door frame. Starting at one corner, carefully press the new gasket into the groove, working your way around the entire door. Apply even pressure to ensure the gasket sits fully in the channel. Some gaskets require a special tool to install, so consult your manual if needed.
Once installed, close the door gently and check that it seals evenly all the way around. Run a test cycle on an empty dishwasher and monitor for leaks. If the door still leaks after gasket replacement, the issue likely lies with the door latch mechanism or frame alignment. At this point, consulting a professional technician is recommended.
Signs Your Dishwasher Needs Replacing
Sometimes a leaking dishwasher is a sign that replacement is more economical than repair. If your dishwasher is more than 10 years old and develops a major leak, repair costs can approach the price of a new unit (energy.gov). Repeated leaks, even after repairs, suggest underlying structural or mechanical problems that are expensive to diagnose and fix.
Consider replacement if the dishwasher has other significant issues beyond the leak: poor cleaning performance, rust inside the tub, unusual noises during operation, or electrical problems. Combining multiple repairs often costs more than investing in a new appliance. Modern dishwashers are also more water and energy efficient, which can offset the initial purchase price through lower utility bills over time (energystar.gov).
If you decide replacement is the right choice, Fast Appliances LLC offers a comprehensive selection of dishwashers with convenient online ordering and home delivery. Our wide variety of models means you can find an appliance that fits your kitchen, budget, and cleaning needs without the hassle of shopping in-store. Whether you need a basic model or a feature-rich option with advanced filtration and quiet operation, we can help you find the right fit for your home.
When evaluating whether to repair or replace, think about the age of your unit and the severity of the leak. A simple gasket replacement on a relatively new dishwasher is usually worth doing. A major leak on an aging unit often signals it's time to move forward with a replacement.
A leaking dishwasher doesn't always require professional intervention, but it does require prompt attention. Water damage to your kitchen cabinets and flooring can become expensive quickly, so addressing the leak as soon as you notice it prevents more costly problems down the road. Most common leaks stem from issues you can diagnose and fix yourself with basic tools and patience. If your repairs don't resolve the leak or if you discover the problem is more complex than expected, that's when calling a professional technician makes sense. And if your dishwasher is aging or develops repeated problems, Fast Appliances LLC provides reliable replacement options delivered right to your door, giving you peace of mind and a fresh start with modern, efficient appliance technology.
Frequently Asked Questions
Q: Can a leaky dishwasher be repaired?
Most dishwasher leaks can be repaired if caught early. Common fixes include replacing the door gasket, tightening hose clamps, and clearing clogs from the drain system. However, if your dishwasher is older or has multiple failing components, replacement may be more cost-effective than repair. A professional technician can assess whether repair or replacement makes sense for your situation.
Q: Why is my dishwasher leaking from underneath?
Leaks from underneath typically indicate problems with the drain hose, water inlet valve, or the drain pump. Check if the drain hose is kinked, cracked, or loose at the connection points. Also inspect the float switch and float assembly to ensure they're not stuck, which can cause water to overflow. If the leak appears near the front, the issue may be a worn door gasket or faulty door latch allowing water to escape during the cycle.
Q: What are the most common parts that cause dishwasher leaks?
The door gasket, water inlet valve, drain hose, and hose clamps are the most frequent culprits. Detergent-related leaks also occur when too much soap or the wrong type of detergent creates excessive suds that overflow. The float assembly can malfunction and prevent proper water level control, and the spray arm can crack and spray water outside the tub. Regular inspection of these components helps catch problems before they worsen.
Q: Is it worth fixing a leaky dishwasher?
The answer depends on your dishwasher's age and the repair cost. For older models or those with multiple failing parts, replacement becomes the smarter investment. Consider your warranty coverage and whether the appliance still meets your needs. Fast Appliances LLC can help you explore replacement options if repair isn't practical.
This article was written using GrandRanker